


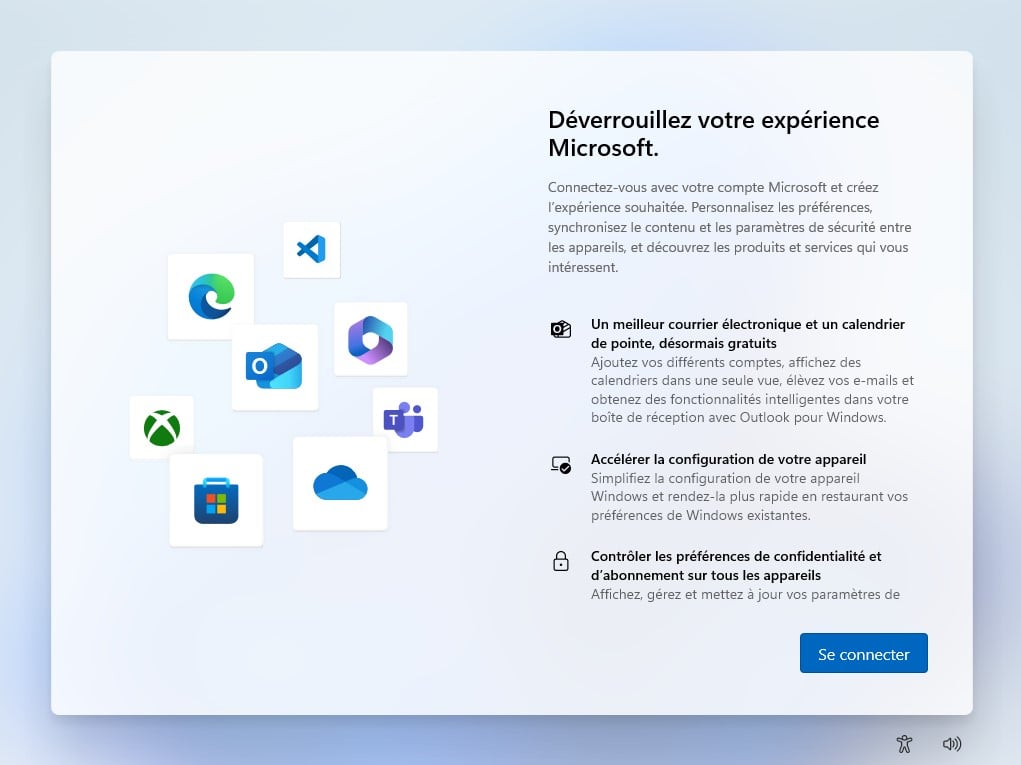
Since Windows 11, it is necessary to log in or create a Microsoft account to install the system. Here is the procedure to follow to overcome this obligation.
 Source: Photo by Sunrise King on Unsplash
One of the most controversial additions to Windows 11, aside from its Start menu, is the requirement to be connected to the internet and sign in to a Microsoft account to install the system on any PC.
This obligation can be very restrictive if you have to change machines or if you simply do not want to do without a Microsoft account to use Windows 11. Fortunately, there are rather simple solutions to avoid this obligation.
Install Windows 11 in offline mode
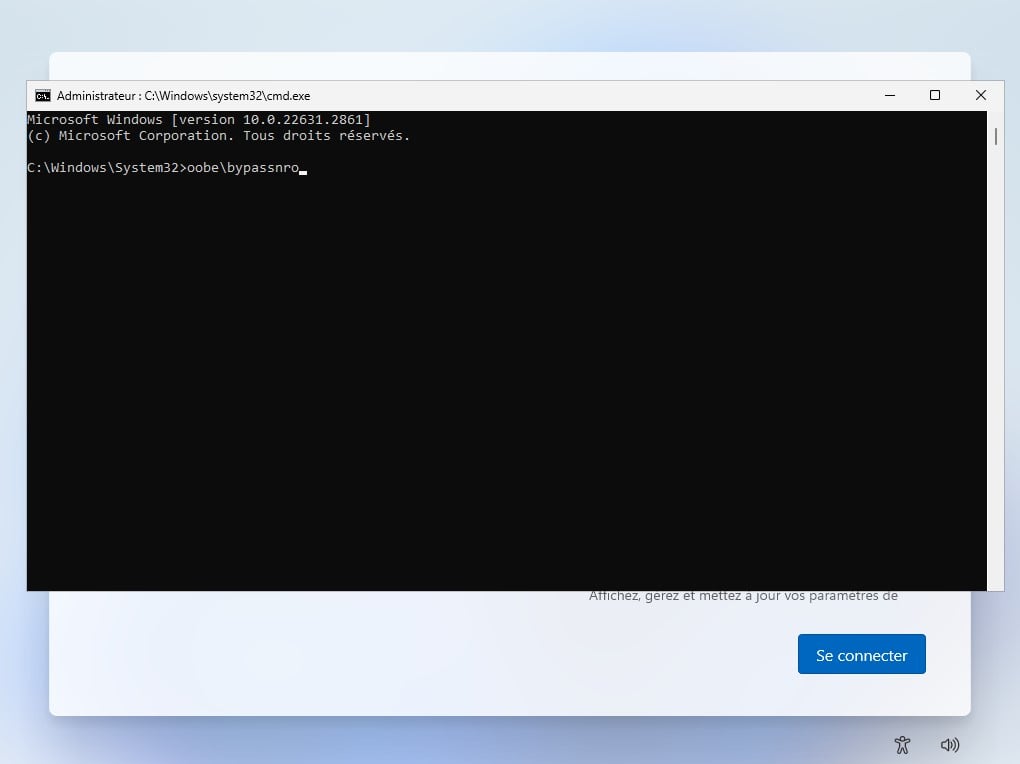
If you already have support for installing Windows 11, the process will systematically ask you to connect to the internet, wired or via a Wi-Fi network, to then create or connect to a Microsoft account.
But it is possible to circumvent this obligation via a simple command line. Here are the steps to follow :
When Windows Setup asks you to connect to the Internet, press the keys Shift + F10 in order to launch a guest command
In this command prompt, type OOBE\BYPASSNO then Enter. The installation process will restart.
Once you arrive at the window asking you to connect to the internet, click on “I don’t have internet”
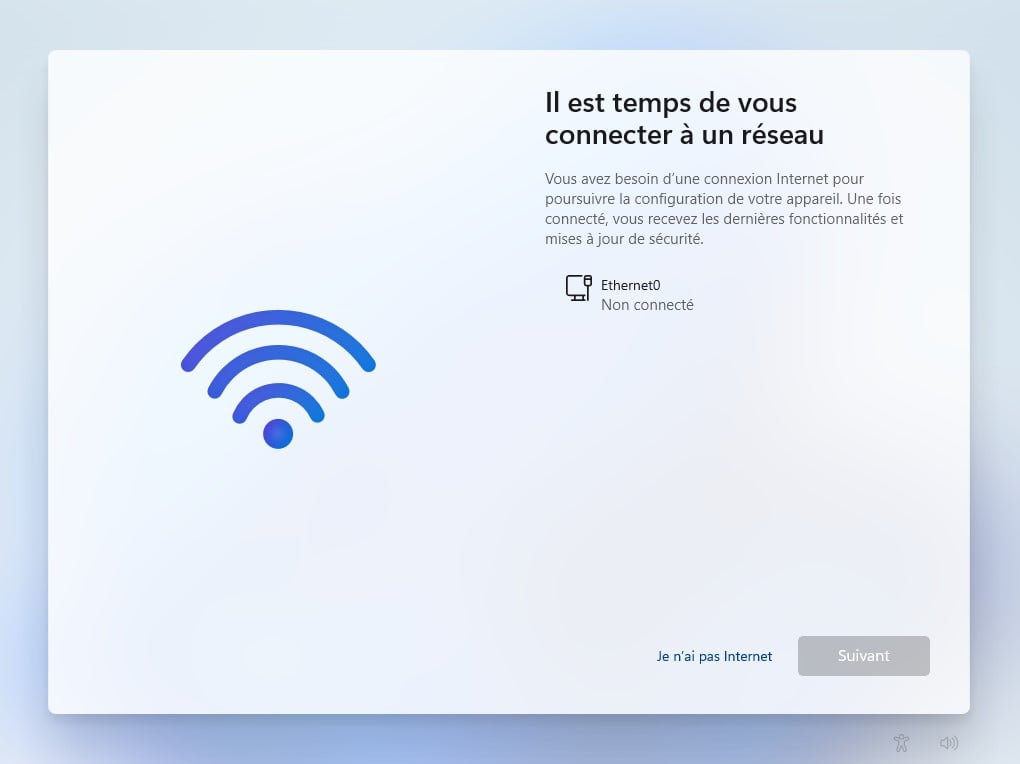
In the next window, click “Continue with limited installation”
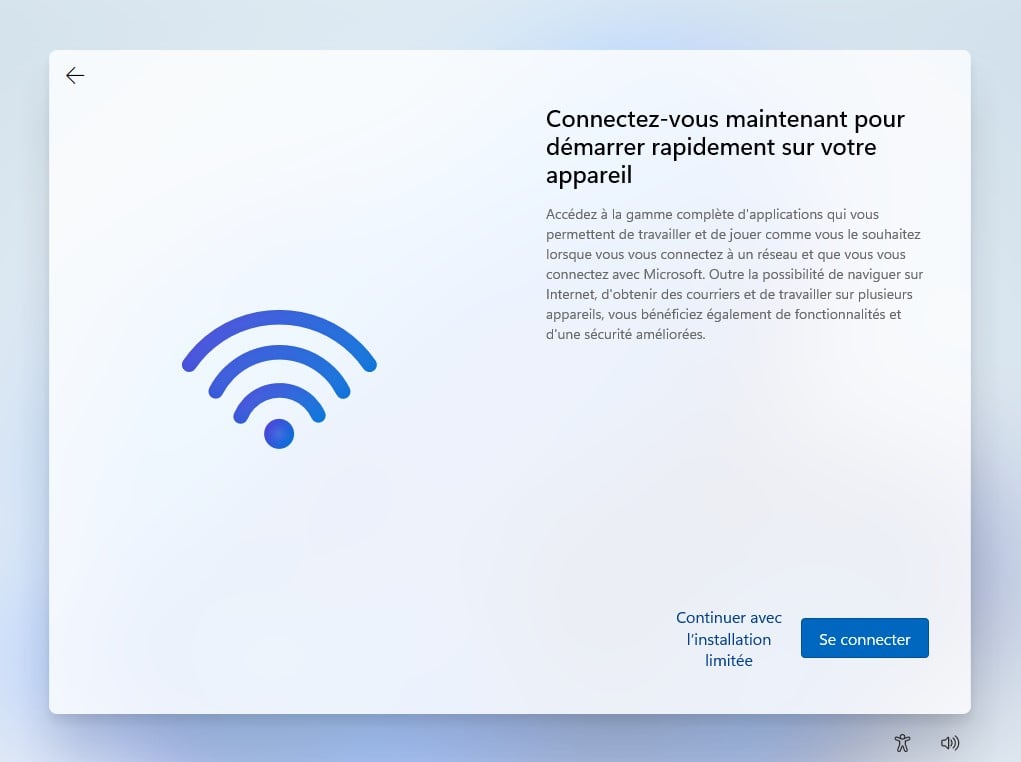
You can finally validate the installation
Once this has been done, you will be able to create a local account for your new installation of Windows 11. It will always be possible to add a Microsoft account later via the system settings.
Change Windows 11 installation with Rufus
It is also possible to modify the Windows 11 image file so that it does not ask you to connect to the internet at any time. Several tools exist, but one of the simplest remains Rufus, which allows you to create a bootable USB key of the OS, but also to modify some parameters.
Download a Windows 11 image from the official Microsoft website. Download Rufus and install it on your machine (in portable version to save time) In Rufus, select the .iso file you just downloaded. The program will automatically detect the rest of the options.
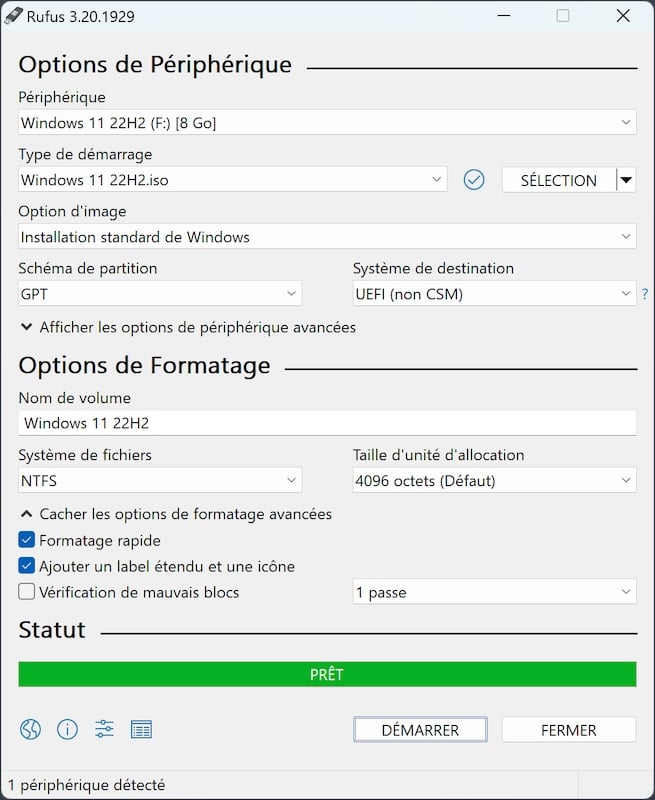
Plug in your USB drive and click “Start” at the bottom of the window. A new window will appear allowing you to customize the Windows installation. Check the “Remove the need to use a Microsoft online account” option.
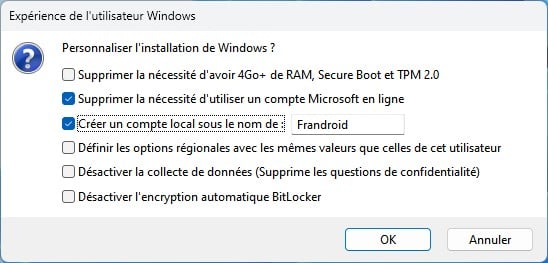
Optional (but recommended): you can also check the “Create a local account under the name of” option to save a step during installation.
Once the creation of your USB key is finalized, you can use it to install Windows when you start your computer. At no time will you be asked to connect to the internet or sign in to a Microsoft account.
Please note that you will still be able to transform this local account into an online Microsoft account via the Settings > Accounts > Your information menu.
Want to join a community of enthusiasts? Our Discord welcomes you, it is a place of mutual help and passion around tech.


